How to Create a DTF Gang Sheet: A Step-by-Step Guide (2025)
In the world of DTF printing, efficiency is profit. One of the single most important skills to master is creating a gang sheet. A well-made gang sheet allows you to fit dozens of different designs onto a single roll of film, drastically reducing material waste and printing time.
But what exactly is a gang sheet, and what’s the best way to create one?
This guide will walk you through the entire process, from a manual setup in graphic design software to the automated, optimized approach used by top print shops.
What is a DTF Gang Sheet?
A DTF gang sheet is a single, large digital file that contains multiple, individual designs “ganged” or grouped together. The goal is to arrange these designs as tightly as possible, like a game of Tetris, to maximize the usable area of your DTF film. Instead of printing one small logo at a time, you print an entire sheet full of different jobs.
Method 1: The Manual Gang Sheet Setup (in Photoshop/Illustrator)
Creating a gang sheet manually is possible, but it’s a time-consuming process that requires precision and patience. Here are the typical steps:
Create Your Canvas: Start by creating a new document with the exact dimensions of your DTF film roll width (e.g., 60 cm or 24 inches) and your desired length (e.g., 100 cm or 1 yard). Set the resolution to 300 DPI and the background to transparent.
Import Your Designs: Open all your individual, print-ready PNG files (with transparent backgrounds).
Copy and Paste: One by one, copy each design and paste it as a new layer onto your main gang sheet canvas.
Arrange and Nudge: This is the hardest part. Manually move, rotate, and nudge each design to fit them as closely as possible. Use your arrow keys for precision. Remember to leave a small margin (a few millimeters) between designs to allow for easy cutting later.
Fill the Gaps: Look for small, empty spaces and try to fill them with smaller designs, like neck labels or sleeve logos. This is where most of the manual effort goes.
Save the Final File: Once you’re satisfied, save the entire canvas as a single, high-resolution PNG or TIFF file, ready to be sent to your RIP software.
The Problem with the Manual Method:
While possible, manual ganging is inefficient. It’s nearly impossible for a human to find the truly optimal layout. This leads to wasted space on every single print run, which adds up to significant financial loss over time. It’s also a major time sink for your most valuable asset: your print operator.
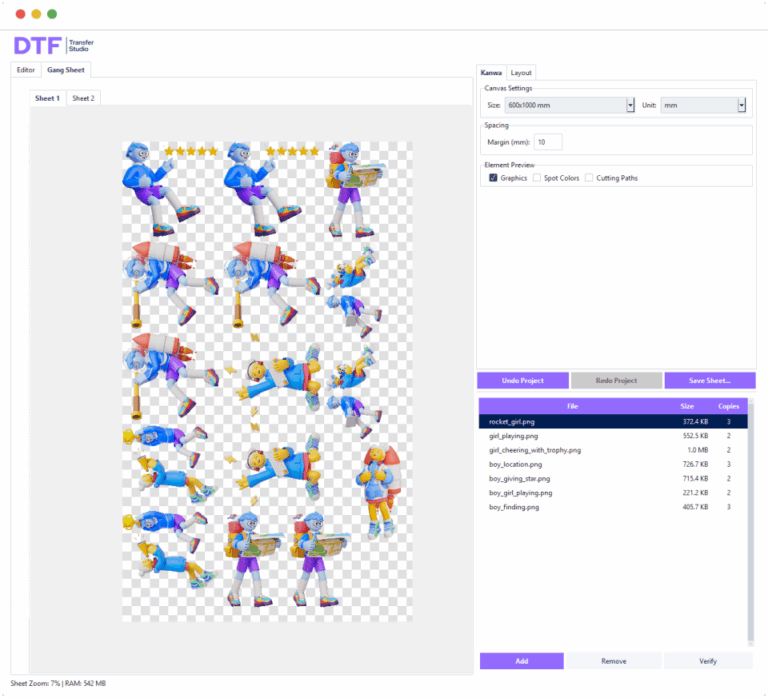
Method 2: The Automated Workflow with Nesting Software (The Pro Method)
Professional print shops don’t waste time manually arranging files. They use specialized DTF nesting software to do the work for them, achieving perfect results in seconds.
This is exactly what DTF Transfer Studio was built for.
Stop Playing Tetris. Start Printing.
Instead of spending an hour manually dragging layers, imagine this workflow:
Import all your files into DTF Transfer Studio.
Set your desired number of copies for each design.
Click one button: “Optimize Layout”.
Our powerful nesting algorithm analyzes thousands of combinations in seconds and instantly generates a perfectly packed gang sheet, saving up to 30% more film than manual arrangement. It even creates multiple sheets automatically if your job is too big for one.
This is how top-tier shops operate – by automating repetitive tasks to increase throughput and maximize profit.
Start Your Free Trial and Create Your First Gang Sheet in 60 Seconds